Open your kitchen cupboards, and you’ll likely find stacks of mismatched containers, half-used spice jars buried in the back, and pots that require a game of Tetris just to extract. Poor cupboard organization doesn’t just waste space, it wastes time, money, and sanity. Every minute spent digging for that elusive lid is a minute you’re not cooking. Fortunately, maximizing kitchen cupboard storage doesn’t require a full renovation or a contractor’s budget. With the right hardware, a few strategic upgrades, and honest assessment of how you actually use your kitchen, even the most cramped cupboards can become efficient workhorses.
Table of Contents
ToggleKey Takeaways
- Kitchen cupboard storage organization can reduce meal prep time by up to 30% and save money by preventing damaged dishes and expired food waste.
- Pull-out shelves for base cabinets are the most impactful upgrade, costing $30–$80 per shelf and providing full-depth access without archaeological searches.
- Upper cupboards benefit from affordable vertical solutions like shelf risers ($10–$20) and undershelf baskets that nearly double usable storage capacity.
- Corner cupboards are best tackled with lazy Susans, pull-out systems, or by designating them for rarely-used seasonal items to maximize kitchen cupboard space.
- Measure your cabinet dimensions (width, depth, height between shelves) before purchasing organizers to avoid costly returns and ensure proper fit.
- Budget-friendly DIY options like tension rods ($5–$10), pegboard panels, and fabric bins deliver professional-level organization without retail markups.
Why Kitchen Cupboard Organization Matters More Than You Think
Disorganized cupboards aren’t just an aesthetic problem. They’re a functional drain on your daily routine. When items are stacked haphazardly, you’re forced to move three things to reach one, which discourages cooking from scratch and encourages takeout.
Beyond convenience, proper cupboard organization protects your investment. Plates chipped from overcrowding, expired food hidden behind newer purchases, and wasted cabinet real estate all cost money over time. A well-organized cupboard system also makes meal prep faster, studies show that reducing visual clutter in the kitchen can cut prep time by up to 30%.
Finally, maximizing vertical and depth space means you might not need that kitchen remodel after all. Before adding new cabinets (which can run $150-$500 per linear foot installed), exhaust the potential of what you’ve already got. Most kitchens waste 40-50% of available cupboard volume simply due to poor use of vertical stacking and corner access.
Assessing Your Kitchen Cupboard Space and Storage Needs
Start with an honest inventory. Pull everything out of one cupboard at a time. Yes, everything. Group items by category: baking supplies, dinnerware, dry goods, pots and pans, small appliances.
Measure your cupboard interiors, width, depth, and height between shelves. Most standard base cabinets are 24 inches deep and 34.5 inches tall (interior), while uppers are typically 12 inches deep. Write these dimensions down. You’ll need them when shopping for organizers, and eyeballing leads to returns.
Next, identify your pain points. Are shelves too tall, leaving dead space above stacked plates? Is the corner cupboard a black hole where mixing bowls go to die? Do you have deep base cabinets where items get lost in the back? Prioritize solutions for your top three problem areas rather than trying to overhaul everything at once.
Consider frequency of use. Items you grab daily (coffee mugs, everyday plates) should sit at eye level or within easy reach. Seasonal or specialty items (roasting pans, holiday serveware) can go up high or deep in corners.
Smart Storage Solutions for Upper Cupboards
Upper cupboards are prime real estate, but most come with just one or two fixed shelves, a waste of vertical space. Shelf risers (metal or acrylic platforms, 6-8 inches tall) double your usable surface by stacking plates or mugs in tiers. They’re inexpensive ($10-$20) and require zero installation.
For glasses and mugs, consider undershelf baskets that hang from existing shelves. These wire baskets slide onto shelves and create an additional tier below, perfect for small items like tea boxes or napkin rings. They work best in cupboards with at least 12 inches of vertical clearance between shelves.
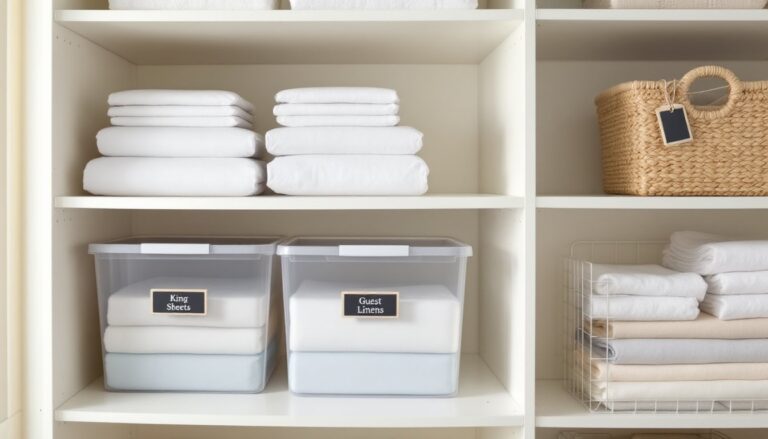
Lazy Susans aren’t just for corner cabinets. A 12-inch turntable on an upper shelf keeps spices, oils, or vitamins accessible without the dreaded reach-and-knock-over scenario. Look for non-slip models with raised edges to contain bottles. Homeowners often discover that organizing techniques used in convenient storage systems translate well to kitchen cupboards.
If you store food in upper cabinets, use clear airtight containers for dry goods like pasta, rice, and cereal. Square or rectangular containers maximize space better than round ones. Label them with contents and purchase date using a label maker or masking tape and marker.
Safety note: Don’t overload upper cupboards. Wall-mounted cabinets rely on screws into studs or drywall anchors, and most aren’t rated for more than 50-75 pounds per cabinet. If shelves sag or doors don’t close flush, redistribute weight.
Maximizing Lower Cupboard and Base Cabinet Space
Base cabinets offer the most cubic footage but are notoriously underutilized. The deep 24-inch depth means items shoved to the back become archaeological finds.
Pull-out shelves (also called roll-out trays or glide-out shelves) are the single best upgrade for base cabinets. These drawer-like shelves mount to the cabinet sides on full-extension ball-bearing slides, letting you access the entire depth with one pull. Retrofit kits cost $30-$80 per shelf and install with a drill and screwdriver in about 30 minutes. Measure your cabinet opening width (not the door width, the actual interior space) before buying. Many professional organizers recommend solutions from manufacturers that emphasize wooden storage components for durability.
Vertical dividers or tension rods inside base cabinets corral baking sheets, cutting boards, and pan lids. Adjustable dividers (typically $20-$40) let you customize spacing. Install them vertically so items stand on edge like files in a cabinet, rather than stacking flat.
For pots and pans, tiered pan organizers or pot lid holders keep cookware from nesting into an impossible tangle. A simple wire rack system lets you stack pans with space between each, so you’re not lifting four pans to grab the one you need.
Don’t ignore the cabinet door backs. Over-the-door racks (hooks, baskets, or narrow shelves) add storage for foil, plastic wrap, cleaning gloves, or measuring spoons. Make sure the rack doesn’t interfere with shelves when the door closes, test before drilling.
Under-sink cabinets are tricky due to plumbing, but stackable sliding baskets or U-shaped organizers that fit around pipes maximize usable space. Keep cleaning supplies in a caddy or bin so you can lift them out entirely when accessing the garbage disposal or trap.
Corner Cupboard Storage Hacks That Actually Work
Corner cupboards, especially the blind base corner, are where kitchen storage goes to die. Traditional solutions like lazy Susans help, but they waste the outer edges of the space. A 36-inch diameter two-tier lazy Susan is the standard for a blind corner cabinet and costs $50-$150 depending on quality. Look for models with high edges or rails to prevent items from sliding off during rotation.
A better option for many kitchens is a pull-out corner system (sometimes called a LeMans unit or Magic Corner). These hardware-heavy solutions use swing-out or pull-out mechanisms to bring the entire corner contents to you. Expect to pay $200-$400 for quality hardware, and installation is more involved, mounting brackets to cabinet sides, adjusting alignment. If you’re not comfortable with a drill and level, hire a handyman for this one.
For upper corner cabinets, tiered lazy Susans or corner shelving inserts that mount diagonally across the corner make items visible and reachable. You can also install a corner appliance garage if the cabinet is tall enough, basically a small countertop-level shelf that hides the coffee maker or toaster when not in use.
If your corner is truly inaccessible, accept that it’s long-term storage and keep only rarely used items there: holiday platters, the roasting pan, or the fondue set you’ve used twice since 2018. Ideas for tackling awkward kitchen corners appear frequently on trusted kitchen design resources that focus on small-space solutions.
Budget-Friendly DIY Kitchen Cupboard Organization Projects
Not every storage upgrade requires buying purpose-built organizers. A few DIY solutions deliver results without the retail markup.
Tension rods (the kind used for shower curtains) installed vertically inside cabinets create instant dividers for baking sheets and cutting boards. Cost: $5-$10 for a two-pack. Just twist to fit snugly between the top and bottom of the cabinet.
Pegboard panels cut to fit the back or side of a cabinet (especially under-sink cabinets) let you hang spray bottles, brushes, or small tools on hooks. Use ¼-inch pegboard, available at home centers for about $10 per 2×4-foot sheet. Secure it with small screws or heavy-duty adhesive strips. Paint or prime the pegboard first so it doesn’t look industrial.
DIY pull-out trash drawer: If you’ve got a wide base cabinet without a center stile (the vertical divider between doors), mount a bottom-mount drawer slide kit ($15-$30) to the cabinet floor and attach a simple plywood platform for your trash can. This works best with rectangular bins. You’ll need a drill, screws, and basic carpentry skills. Many indoor storage guides provide step-by-step instructions for similar slide-out projects.
Fabric or wire bins from discount stores (Target, IKEA, dollar stores) work just as well as “official” cabinet organizers for corralling snack bags, tea boxes, or packets. Measure your shelf depth first, bins that are too deep won’t pull out easily.
Magazine holders (the angled file organizers) can store pot lids, plastic container lids, or even packaged foods like boxed pasta. Turn them on their side in a lower cabinet for easy access. Testing and reviews from outlets like Real Simple often highlight creative uses for everyday items.
For labeling, skip expensive label makers and use a paint pen or chalkboard labels (adhesive squares you can write on with chalk markers). Both are under $5 and look surprisingly polished.
Conclusion
Maximizing kitchen cupboard storage isn’t about buying more stuff, it’s about using the space you’ve already got with intention and the right hardware. Whether you retrofit pull-out shelves, wrangle corner cabinets with a lazy Susan, or simply add shelf risers and tension rods, every improvement pays off in daily convenience. Start with one problem cupboard, measure twice, and invest in solutions built to last. Your future self, standing in front of an organized cupboard at 6 a.m. looking for coffee filters, will thank you.