A bathroom mirror isn’t just a reflective surface, it’s the command center of every morning routine. When that mirror also provides built-in lighting and storage, it transforms from a simple fixture into a problem-solver that eliminates counter clutter, improves visibility for grooming tasks, and streamlines the entire bathroom experience. Combination mirror units with lights and storage offer a trifecta of function: they save wall space, reduce the need for separate fixtures, and create a cohesive look that feels intentional rather than cobbled together. Whether tackling a full bathroom remodel or just upgrading a tired vanity area, understanding the options and installation requirements helps homeowners make smart choices that deliver long-term value.
Table of Contents
ToggleKey Takeaways
- A bathroom mirror with lights and storage consolidates three functions into one space-saving fixture, eliminating the need for separate mirrors, sconces, and medicine cabinets while reducing installation complexity.
- Integrated LED lighting positioned around the mirror perimeter delivers even, shadow-free illumination at face height—far superior to harsh overhead fixtures for grooming and makeup tasks.
- Recessed medicine cabinets save floor space but require cutting between studs, while surface-mounted units offer easier retrofit installation without wall demolition.
- Mirror quality matters: invest in 1/4-inch plate glass with copper-free backing and anti-fog coatings to resist distortion, chipping, and condensation in humid bathroom environments.
- Mount your bathroom mirror with lights and storage at 60 to 65 inches from the floor, centered at eye height, with the bottom edge 4 to 6 inches above the countertop to avoid splashback.
- Storage accessibility boosts daily efficiency—keep frequently used items on middle shelves, bulky or seasonal products on top or bottom, and position electrical outlets near charging-enabled grooming tools.
Why Choose a Bathroom Mirror with Lights and Storage?
The traditional approach, separate mirror, sconces, and medicine cabinet, works, but it demands more wall real estate and introduces multiple installation tasks. An integrated unit consolidates these functions into a single footprint, which is especially valuable in compact bathrooms or powder rooms where every square inch counts.
Space efficiency tops the list of practical benefits. A single cabinet that combines mirrored doors, LED strips, and adjustable shelving eliminates the need for bulky side cabinets or over-toilet storage towers. This is critical in bathrooms narrower than 5 feet, where layering fixtures creates visual clutter and reduces usable floor space.
Built-in lighting delivers task-level illumination exactly where it’s needed, at face height, with even distribution that minimizes shadows under the chin and around the jawline. Unlike overhead fixtures that cast harsh downlight, integrated LED strips or side bars wrap around the mirror perimeter, mimicking the soft, diffused quality of natural daylight. Most units offer color temperature options ranging from warm white (2700K–3000K) for relaxed evening routines to cool white (4000K–5000K) for precision shaving or makeup application.
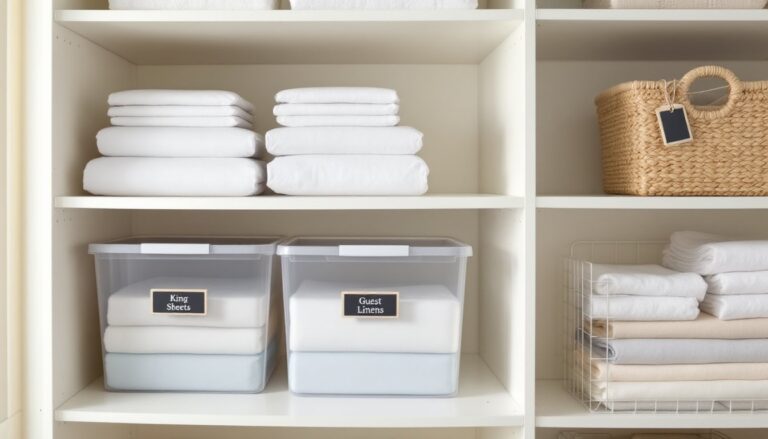
Storage keeps countertops clear. Toothbrushes, medications, skincare products, and grooming tools disappear behind mirrored doors, reducing visual noise and simplifying cleaning. Adjustable shelves accommodate everything from tall aerosol cans to short prescription bottles, and many models include built-in electrical outlets or USB ports for charging electric razors and toothbrushes without occupying vanity plugs.
Finally, installation simplicity matters. Mounting a single unit is faster and less invasive than coordinating rough-in electrical for sconces, patching drywall around a recessed cabinet, and aligning a separate mirror. For homeowners comfortable with basic carpentry and electrical work, a combo unit often requires just one 120V circuit and a few toggle bolts or wall anchors rated for the unit’s weight.
Types of Bathroom Mirrors with Lights and Storage
Not all mirror-light-storage combinations are built the same. Understanding the core configurations helps match a unit to a bathroom’s layout, plumbing constraints, and user needs.
Medicine Cabinet Mirrors with Integrated Lighting
These are the workhorses of bathroom storage, recessed or surface-mounted cabinets with mirrored fronts and internal shelving, now upgraded with built-in LED lighting. Recessed models sit flush with the wall, requiring a cavity cut between studs (typically 14.5 inches wide for standard 16-inch on-center framing). They save floor space but demand careful planning: avoid plumbing chases, electrical runs, and HVAC ducts when choosing placement.
Surface-mounted medicine cabinets install directly onto drywall or tile, making them ideal for retrofit projects where cutting into walls isn’t practical. They protrude 4 to 6 inches from the wall, which can intrude into tight spaces but eliminates demolition and patching.
Lighting integration varies. Entry-level units feature top-mounted LED bars that shine downward, while mid-range options include perimeter lighting along two or three edges for more even coverage. Premium models offer backlit mirrors with frosted panels that glow softly behind the glass, plus adjustable brightness and color temperature via touch controls or remote.
Mirror Cabinets with Side or Shelf Storage
These units expand storage horizontally, flanking a central mirror with open shelves or closed cabinets. Common layouts include:
- Tri-panel designs with a central mirror and two side cabinets, each 12 to 18 inches wide. Total width typically spans 48 to 60 inches, matching double-vanity setups.
- Single mirror with asymmetric storage, where one side features stacked shelves or a narrow cabinet. This works well over a 30- to 36-inch vanity when only one person uses the space regularly.
Lighting on these models often takes the form of vertical LED strips along the inside edges of side cabinets or horizontal bars above and below the mirror. Some high-end units incorporate shelf lighting with motion sensors that activate when cabinet doors open, a nice touch for late-night trips without blinding overhead lights.
Materials matter here. Look for moisture-resistant MDF or plywood with sealed edges and corrosion-resistant hardware. Bathrooms generate humidity levels above 60% during showers, and poor-quality particleboard will swell and delaminate within a year. If the unit includes glass shelves, confirm they’re tempered safety glass at least 1/4 inch thick.
Key Features to Consider Before Buying
Walk into any big-box home center and the options blur together. Drilling down on a few critical specs separates long-lasting upgrades from disposable fixtures.
Lighting controls and power source come first. Hardwired units (connected directly to household electrical via junction box) offer cleaner aesthetics, no visible cords, but require either an existing circuit or hiring an electrician to run one. Code-compliant installations follow NEC Article 410 for luminaire placement in wet and damp locations: fixtures within 8 feet of a tub or shower must be rated for damp or wet use. Plug-in models are easier for DIY installation but leave a cord trailing down the wall unless an outlet is hidden behind the unit.
Some mirrors with integrated lights include battery-powered LED strips for retrofit situations where running new wiring isn’t feasible. Expect to replace batteries every 6 to 12 months depending on daily usage, a minor hassle, but it beats cutting into tile.
Adjustable color temperature and dimming add versatility. A mirror that switches between warm white for evening wind-down and cool white for morning grooming suits households with varied routines. Touch-sensitive controls or motion sensors beat fumbling for switches with wet hands.
Storage capacity depends on household size and product inventory. A family of four needs more shelf space than a single occupant. Measure existing toiletries, medications, and grooming tools to gauge required depth (typically 4 to 6 inches) and height. Adjustable shelves beat fixed ones: they adapt as storage needs change.
Mirror quality isn’t all equal. Cheap mirrors use thin glass (1/8 inch) that distorts reflections and chips easily. Look for 1/4-inch plate glass with a copper-free backing that resists corrosion in humid environments. Some units feature anti-fog coatings or built-in defogger pads, thin heating elements behind the glass that prevent condensation during showers. These draw minimal power (around 20–40 watts) and extend mirror usability in heavily used bathrooms.
Mounting and weight capacity matter for recessed cabinets. A fully loaded medicine cabinet can weigh 40 to 60 pounds. Recessed models rely on fasteners driven into surrounding studs, which is solid. Surface-mounted units need toggle bolts or wall anchors rated for at least 100 pounds when installed in drywall, or masonry anchors if mounting to tile over concrete backer.
Finally, warranty and build quality signal long-term reliability. Look for units with at least a two-year warranty covering defects in materials and workmanship. Inspect hinge mechanisms (soft-close beats cheap friction hinges), drawer glides (ball-bearing outlast plastic tracks), and mirror-edge finishing (beveled or polished edges resist chipping).
Installation Tips for DIY Homeowners
Installing a bathroom mirror with lights and storage falls within reach of most homeowners comfortable with basic carpentry and electrical work, but it’s not a casual afternoon project. Proper prep and a methodical approach prevent crooked mirrors and electrical headaches.
Plan the rough-in first. If hardwiring, locate the nearest junction box or plan a new circuit run. Bathroom lighting circuits typically run on 15-amp or 20-amp breakers and must include GFCI protection per NEC requirements. If the mirror’s LED system draws more than 1.5 amps (rare, but check specs), it may need a dedicated circuit. For plug-in models, confirm an outlet exists within cord reach or install one. Outlets near sinks must be GFCI-protected and positioned to avoid water splash.
Locate studs accurately. Use a stud finder to mark 16-inch on-center framing. For recessed cabinets, confirm the wall cavity is clear of obstructions, knock on the wall and listen for hollow vs. solid sounds, or use an inspection camera if available. Cut the opening with a drywall saw or reciprocating saw, then frame the rough opening with 2×4 blocking between studs if the cabinet requires added support.
Surface-mounted units are simpler but still demand precision. Mark the mounting height, standard vanity mirrors center at 60 to 65 inches from the floor, though personal height and vanity dimensions can shift this. Use a 4-foot level to mark a perfectly horizontal reference line: a crooked mirror broadcasts amateur work to every visitor.
Secure the unit to studs wherever possible. If studs don’t align with mounting holes, use toggle bolts rated for 100+ pounds in drywall or sleeve anchors in tile over concrete. Enlist a helper, these units are awkward to hold level while marking holes.
Electrical connections follow standard protocol: turn off power at the breaker, verify it’s dead with a non-contact voltage tester, and connect wires in the junction box (black to black, white to white, ground to ground). Use wire nuts rated for the wire gauge and wrap connections with electrical tape. If you’re uncomfortable working with household voltage, hire a licensed electrician. Many DIY repair tutorials demonstrate proper technique, but nothing replaces hands-on practice under safe conditions.
Finishing touches include caulking the perimeter (use clear silicone or color-matched latex) to seal gaps and prevent moisture intrusion. Adjust shelves, test lighting controls, and confirm doors open and close smoothly without binding. For recessed installs, patch and paint the surrounding drywall to blend the unit into the wall.
A note on permits: cosmetic fixture replacement rarely requires a permit, but running new electrical circuits or altering wall framing might. Check with the local building department. In most jurisdictions, homeowner-performed electrical work is legal on owner-occupied single-family homes, but rules vary.
Best Placement and Design Ideas for Your Bathroom
Where and how a mirror sits shapes the entire bathroom’s functionality and visual flow. Smart placement respects human ergonomics, lighting physics, and design principles.
Height and sightline come first. The mirror’s center should align with average eye height, about 60 to 65 inches from the floor for most adults. In households with significant height variation (kids and tall adults), aim for the midpoint or install a larger mirror that captures the full range. A 24-inch-tall mirror centered at 63 inches covers roughly 51 to 75 inches, which works for most users.
Proximity to the vanity matters. The bottom edge of the mirror should sit 4 to 6 inches above the countertop to avoid splashback and allow room for faucets or backsplash tile. If the vanity includes a vessel sink, add extra clearance, the sink rim may rise 6 to 8 inches above the counter.
Lighting angle and placement determine shadow control. Integrated LED strips along the mirror’s top and sides deliver the most even illumination, minimizing shadows under the eyes and chin. If relying on overhead lighting alone, shadows fall harshly downward, fine for general visibility but poor for grooming tasks. Designers often combine overhead ambient lighting with task lighting at mirror level for layered control.
For bathroom vanity lighting and mirror arrangements, consider the overall aesthetic. In modern bathrooms, sleek frameless mirrors with hidden LED strips maintain clean lines. Traditional styles pair better with framed mirrors and exposed vintage-style bulbs or sconces.
Storage accessibility influences daily workflow. Frequently used items (toothpaste, daily medications, contact lens supplies) belong on easy-reach middle shelves. Bulky or rarely needed items (extra soap, backup razors, seasonal sunscreen) go on top or bottom shelves. If the unit includes electrical outlets, position electric toothbrushes and razors near them to avoid cord tangles.
Moisture and ventilation affect longevity. Even moisture-resistant units suffer in poorly ventilated bathrooms. Run the exhaust fan during and for 20 minutes after showers to reduce humidity. If the bathroom lacks a fan or the existing one is undersized (look for at least 50 CFM for bathrooms up to 50 square feet), consider an upgrade. Excess moisture accelerates wood warping, metal corrosion, and mirror delamination.
For design cohesion, match the mirror-cabinet finish to other bathroom fixtures. Brushed nickel hardware pairs with nickel faucets and towel bars: matte black suits contemporary or industrial themes. Wood-framed units warm up spaces dominated by tile and porcelain. Drawing inspiration from kitchen and bathroom remodel ideas helps visualize how finishes interact across surfaces.
Finally, consider future flexibility. A surface-mounted unit can move to another bathroom or home without leaving a gaping wall cavity. Recessed models are harder to relocate but offer a built-in look that many buyers value. If planning to sell within a few years, neutral finishes and classic proportions appeal to broader tastes than bold design gambles.