A 5-foot-by-8-foot bathroom can hold everything a family needs, if you use vertical inches and dead corners right. Most narrow bathrooms fail storage not because they’re small, but because builders default to a single vanity and a towel bar. That leaves toiletries on the sink rim, towels on the floor, and cleaning supplies under the kitchen sink instead. Strategic storage planning turns wasted wall space, awkward gaps, and door backs into functional square footage without a gut renovation.
Table of Contents
ToggleKey Takeaways
- Narrow bathroom storage succeeds by utilizing vertical wall space, dead corners, and door backs instead of relying on limited floor space.
- Over-the-toilet shelving units, wall-mounted floating shelves, and slim rolling carts are the most practical solutions for narrow bathrooms without requiring renovation.
- Layer storage at different heights—recessed units at 36 inches, functional shelves at 48-60 inches, and backup supplies at 66-72 inches—to maximize accessibility and circulation.
- Surface-mounted shelves, adhesive hooks, and magnetic strips require minimal installation expertise and are renter-friendly alternatives to permanent narrow bathroom storage.
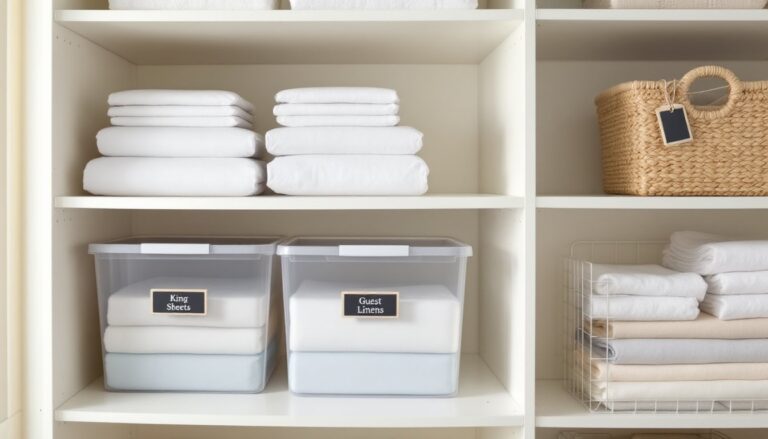
- Strategic under-sink organization with adjustable shelving and drawer dividers transforms cluttered pedestal sinks into organized, multi-tiered storage systems.
- Always mount wall-secured storage to studs or use appropriate drywall anchors rated for 50+ pounds to ensure safety and prevent damage to fixtures.
Why Narrow Bathrooms Need Strategic Storage Planning
Narrow bathrooms, typically 3 to 5 feet wide, impose hard constraints. A standard vanity runs 18 to 24 inches deep, a toilet needs roughly 30 inches of clearance, and code requires a 21-inch minimum in front of fixtures. That leaves minimal floor space for freestanding storage.
The fix is to think in layers: recessed, surface-mounted, and projecting storage at different heights. A 36-inch-tall wall cabinet above the toilet lives in unused airspace. A 4-inch-deep rolling cart slots beside the vanity where a traditional cabinet won’t fit. Each piece targets a specific zone and keeps circulation paths clear.
Permit requirements rarely apply to storage additions unless you’re cutting into a load-bearing wall or moving plumbing. Surface-mounted shelves, adhesive hooks, and freestanding units are all DIY-friendly. If you’re opening drywall to add recessed niches, locate studs with a finder and check for electrical or plumbing runs before cutting.
Vertical Storage Solutions That Work in Tight Spaces
Vertical storage is non-negotiable in a narrow bathroom. Walls offer square footage that floors can’t spare, and mounting hardware has improved enough that renters can install and remove shelves without major patching.
Over-the-Toilet Storage Units
The space above the toilet is dead air in most bathrooms. An over-the-toilet shelving unit (also called an etagere) typically measures 24 to 27 inches wide, 66 to 72 inches tall, and 9 to 12 inches deep. Most models use a two-post frame that straddles the tank.
Look for units with at least three shelves. The bottom shelf should sit 6 to 8 inches above the tank lid to allow for flushing clearance and tank access. Steel or powder-coated metal frames handle humid environments better than particleboard: check weight ratings if you’re storing heavy items like bulk paper goods or large bottles.
Installation is straightforward: assemble the frame per instructions, slide it over the toilet, and level it using adjustable feet if provided. Some models include wall anchors for stability, use them. A tipping unit can crack porcelain or injure someone reaching overhead. If anchoring to drywall, find studs or use #8 toggle bolts rated for 50+ pounds each.
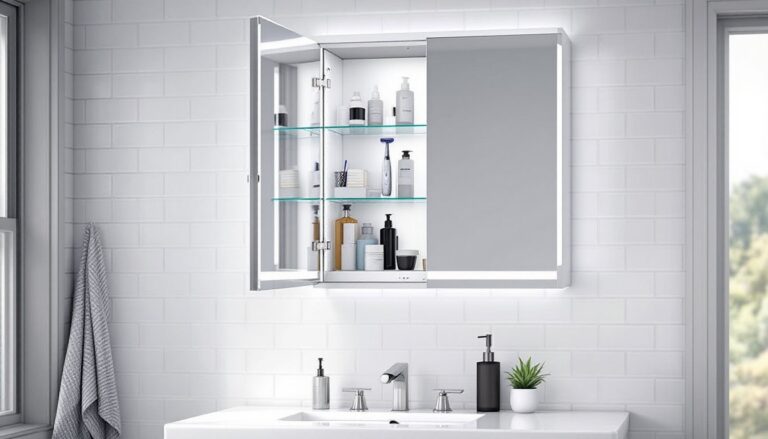
Wall-Mounted Shelves and Floating Cabinets
Floating shelves and wall-mounted cabinets clear floor space while keeping essentials within arm’s reach. Standard floating shelves run 18 to 24 inches long and 6 to 10 ideas deep. Shallower profiles (4 to 6 inches) work above door frames or beside mirrors where deeper shelves would protrude into the walkway.
Mount shelves to studs whenever possible. A typical stud-mounted bracket holds 25 to 50 pounds: drywall anchors max out around 20 pounds depending on thickness and anchor type. For a floating cabinet (a boxed unit with a door), locate at least two studs 16 inches on center and use 3-inch wood screws through the cabinet’s hanging rail.
Install shelves at functional heights: 48 to 60 inches for daily-use items, 66 to 72 inches for backup supplies. Leave at least 12 inches of clearance between the shelf and the fixture below to avoid head bumps and allow easy access. Use a 4-foot level during installation: even a 1-degree tilt becomes obvious once loaded.
Slim Cabinet and Cart Options for Narrow Bathrooms
When wall space is spoken for, slim floor units fill gaps that standard cabinets can’t. A rolling storage cart 4 to 6 inches wide fits beside a toilet, vanity, or in the gap between the sink and the wall. Look for three- or four-tier models with locking casters to prevent drift on tile.
These carts handle toiletries, cleaning supplies, or towels. Metal-frame carts with mesh or slat shelves resist moisture better than laminate. Avoid carts with solid sides if your bathroom has limited ventilation, airflow prevents mildew.
Freestanding slim cabinets (12 to 18 inches wide, 12 to 15 inches deep) work in corners or along open walls. Many skinny storage cabinet designs include adjustable shelves, making them adaptable for everything from cleaning bottles to folded towels. Choose cabinets with finished backs if they’ll be visible from multiple angles.
For truly tight quarters, consider a corner cabinet. Standard corner units are 24 inches per side, but narrow-profile versions run 12 to 16 inches. They use diagonal depth to hold more than a standard flat cabinet in the same footprint. Some models feature curved fronts that reduce the corner’s visual bulk.
Assembly is usually straightforward, align panels, insert cam locks or screws, attach doors. Level units during assembly using shims if your floor isn’t perfectly flat: a rocking cabinet will stress joints and cause doors to misalign.
Creative Door and Wall Space Hacks
Doors and blank wall sections hold more storage potential than most homeowners realize. An over-the-door organizer with pockets or hooks adds zero floor space but holds hair tools, cleaning gloves, or cosmetics. Choose models with padded or rubberized hooks to protect door finish. Check door clearance, most organizers add 2 to 4 inches of depth, which can interfere with tight swing radius in narrow bathrooms.
For a cleaner look, mount a narrow shelf or hook rail directly to the door. Use a 1×4 board (actual dimensions 3/4 by 3-1/2 inches) cut to door width minus 2 inches, stained or painted, and mounted with 1-1/4-inch screws through the door into a backing cleat. Add small hooks or a towel bar along the bottom edge. This setup is more permanent but doesn’t snag on items or sway like an over-the-door organizer.
Magnetic strips mounted on walls or inside cabinet doors hold metal grooming tools, tweezers, nail clippers, bobby pins. A 12-inch strip handles a surprising amount. Adhesive-backed strips work on tile or painted drywall: screw-mounted versions are more secure on uneven surfaces.
Command hooks and adhesive shelves have improved significantly. Look for models rated for humid environments. Most hold 3 to 5 pounds per hook, enough for a hand towel or bathrobe. Surface prep matters: clean with isopropyl alcohol, let dry completely, and press firmly for 30 seconds during installation. Wait 24 hours before loading.
Wall-mounted pegboard panels offer modular storage. A 2-foot-by-2-foot section in a moisture-resistant material like PVC or coated hardboard holds baskets, hooks, and small shelves. Mount it with 1-inch standoffs (spacers) so pegs can insert fully. Many bathroom remodels featured on Houzz showcase pegboard as both functional and design-forward when painted to match walls.
Under-Sink and Vanity Storage Ideas
The cabinet under a pedestal sink or wall-mount vanity is often the only enclosed storage in a narrow bathroom. It’s also typically a mess of exposed plumbing and wasted corners.
Start with a U-shaped or adjustable shelving unit designed to fit around drain pipes. These units (usually 10 to 16 inches wide) create two tiers of usable space. Measure your pipe configuration before buying, P-trap placement varies.
For pedestal sinks without cabinetry, a sink skirt or tension rod curtain hides open storage underneath. Install a tension rod inside the pedestal’s front legs and hang a fabric panel. Behind it, use stackable bins or a small wire rack. It’s not as secure as a cabinet, but keeps supplies out of sight.
Drawer organizers and pull-out trays maximize vanity drawers. A typical bathroom drawer is 12 to 18 inches deep: most items, toothbrushes, makeup, razors, are under 6 inches long, so they slide around. Modular dividers or tiered trays (like those used in kitchen cutlery drawers) corral small items and make them visible at a glance.
If replacing a vanity, consider a wall-hung model with a narrow depth (10 to 14 inches) instead of standard 18 to 21 inches. The reduced projection keeps walkways clear and makes the room feel larger. Many bathroom design sourcebooks on Remodelista highlight wall-hung vanities as a modern solution for tight spaces. Mounting requires locating studs and using lag bolts rated for the vanity’s weight plus contents, typically 100+ pounds. If studs don’t align, install a ledger board (a 2×6 or 2×8 backer) across multiple studs, then mount the vanity to the ledger.
Safety note: Always turn off the water supply and have a bucket ready when working near plumbing. If you’re uncertain about drain or supply line configuration, call a plumber before cutting into cabinetry or moving fixtures.
For renters or those avoiding permanent changes, adhesive-mounted bins and tiered risers offer removable under-sink organization. Rust-resistant plastic or coated wire stands up to the humid environment better than bare metal or cardboard. Design enthusiasts following Apartment Therapy often share budget-friendly hacks using adhesive organizers and tension rods in rental bathrooms.