Dead space above a washer and dryer is a missed opportunity, one that costs most homeowners several cubic feet of usable storage in what’s often the smallest room in the house. A simple shelf over washer and dryer units transforms that gap into a practical spot for detergent, dryer sheets, stain removers, and cleaning supplies. The project requires basic carpentry skills, a few common tools, and about two hours on a weekend afternoon. The payoff? More counter space, less clutter, and a laundry room that actually functions the way it should.
Table of Contents
ToggleKey Takeaways
- A shelf over washer and dryer utilizes dead vertical space to store 30–50 pounds of supplies while improving laundry room organization and functionality.
- Bracket-mounted shelves offer the best balance of strength, cost, and installation ease for most DIYers, requiring basic carpentry skills and about two hours to complete.
- Always anchor brackets directly into wall studs using wood screws; drywall anchors and toggle bolts cannot safely support a fully loaded shelf weighing 40–60 pounds.
- Accurate measurements are critical—ensure at least 3–4 inches of clearance above the shelf for hand access and account for top-loader lid clearance before installation.
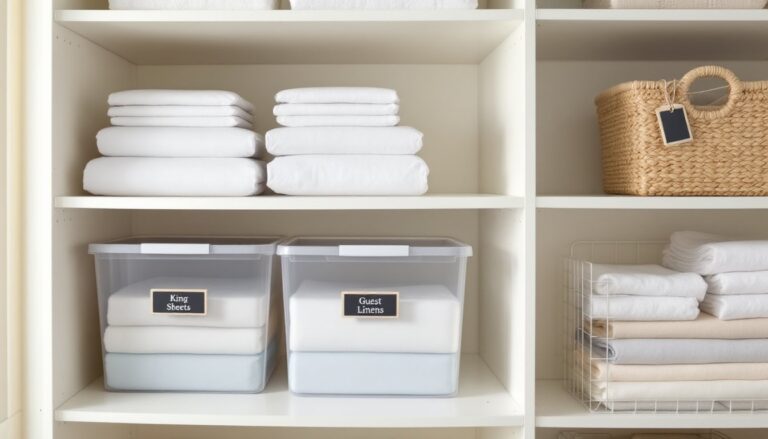
- Organize shelf items by laundry workflow (pre-wash treatments, detergents, post-wash supplies) and use clear bins and labels to maintain visibility and prevent clutter.
- Load-test your installed shelf with firm downward pressure and allow a 24-hour settling period before filling it completely to identify any structural issues.
Why Add a Shelf Above Your Washer and Dryer?
Most laundry setups leave 12 to 24 inches of vertical clearance between the top of the machines and the ceiling or upper cabinetry. That’s enough room for a shelf above washer and dryer that holds 30 to 50 pounds of supplies without interfering with appliance access or ventilation.
The practical benefits stack up quickly. Detergent bottles, fabric softener, bleach, and spot treatments move off counters and window sills. Lint rollers, dryer balls, and stain sticks stay within arm’s reach instead of migrating to random drawers. If the laundry area doubles as a mudroom or utility space, the shelf can also store cleaning rags, shoe polish, or pet grooming supplies.
From a design standpoint, over washer and dryer storage helps unify the room. A well-installed shelf creates a visual connection between appliances and upper cabinets or wall-mounted storage, making the space feel more intentional and less like an afterthought. It’s especially useful in closet laundries or compact units where every inch counts.
Choosing the Right Shelf Type for Your Laundry Space
The choice between floating shelves, bracket-mounted boards, and freestanding over the washer and dryer shelves depends on wall construction, load requirements, and aesthetic preference.
Freestanding units sit directly on top of the washer and dryer without wall attachment. They’re ideal for renters or anyone avoiding wall penetrations, but they limit access to the appliance tops and can shift during heavy spin cycles. Most freestanding racks use tubular steel or powder-coated wire frames and hold 20 to 40 pounds per tier. They work best with front-load machines that don’t vibrate as aggressively as top-loaders.
Bracket-mounted shelves attach to wall studs using L-brackets or heavy-duty shelf brackets. They offer better load capacity, typically 50 to 75 pounds per shelf when anchored into studs, and don’t interfere with appliance surfaces. Standard shelf brackets come in 8-, 10-, and 12-inch depths: choose based on the depth of the items being stored. A 10-inch bracket fits most detergent bottles without protruding too far into the room.
Material options include solid wood (pine, poplar, or oak), melamine-coated particleboard, and wire shelving. Solid wood handles moisture better than particleboard and supports heavier loads, but it costs more and requires finish work. Melamine boards resist moisture and come pre-finished, making them a practical choice for utility spaces. Wire shelving prevents dust accumulation but doesn’t work well for small items like clothespins or dryer sheets.
Floating Shelves vs. Bracket-Mounted Options
Floating shelves use concealed brackets or French cleats, creating a clean, minimalist look without visible hardware. They work well in finished laundry rooms where aesthetics matter, but installation is more involved. The shelf itself must have a routed channel or mounting plate to accept the hidden bracket, and proper stud placement is non-negotiable.
Bracket-mounted washer dryer shelf setups show their hardware but install faster and adjust more easily. If the first set of pilot holes misses the stud, repositioning brackets is straightforward. Floating shelf mistakes often mean starting over with a new board.
For most DIYers tackling a first laundry room shelf project, bracket-mounted options offer the best balance of strength, cost, and installation simplicity. Floating shelves make sense for those with woodworking experience and a router or table saw for prep work.
Measuring and Planning Your Shelf Installation
Accurate measurements prevent the two most common washer and dryer shelf mistakes: shelves mounted too low (blocking appliance lids or control panels) and shelves that miss studs entirely.
Start by measuring the vertical clearance from the top of the taller appliance to the ceiling, soffit, or upper cabinet. Allow at least 3 inches of clearance above the shelf for hand access when grabbing items. If the washer or dryer has a top-load lid, add the lid’s open height to the appliance height, most open to 50 to 55 degrees and require 20 to 24 inches of clearance.
Next, measure the horizontal span. For side-by-side machines, measure from the outer edge of one appliance to the outer edge of the other, then add 1 to 2 inches on each side if the shelf will overhang slightly. A typical washer-dryer pair spans 50 to 60 inches. If using a single shelf board, anything over 48 inches should be supported by at least three brackets to prevent sagging under load.
Locate the studs using a stud finder or the knock-and-probe method. Wall studs in residential construction sit 16 inches on center (sometimes 24 inches in older homes). Mark stud centers with painter’s tape rather than pencil, it’s easier to reposition and won’t leave marks if plans change.
Sketch a quick plan showing stud locations, bracket positions, and shelf height. This helps identify whether the studs align well with the appliance layout or if adjustments are needed. If a critical stud falls directly behind the washer’s water supply valves, plan to offset that bracket by a few inches or use a toggle bolt in drywall as a secondary support (though this should never be the primary anchor for a load-bearing shelf).
Step-by-Step Installation Guide
Gather materials and tools before starting. For a standard bracket-mounted shelf for washer and dryer, the list includes:
Materials:
- One shelf board (¾-inch thick, 10- to 12-inch depth, cut to length)
- Two to four heavy-duty shelf brackets (rated for at least 50 lbs each)
- 2½-inch wood screws (for attaching brackets to studs)
- 1¼-inch wood screws (for attaching shelf to brackets)
- Sandpaper (120-grit) and wood finish or primer/paint if using raw lumber
Tools:
- Cordless drill/driver
- Level (24-inch or longer)
- Stud finder
- Tape measure
- Pencil
- Safety glasses
Step 1: Prep the shelf board. If using raw wood, sand all edges and surfaces with 120-grit sandpaper, then apply primer and paint or a clear polyurethane finish. Melamine and pre-finished boards skip this step. Let finishes cure fully before installation, at least 24 hours for paint, 48 for oil-based poly.
Step 2: Mark bracket locations. Hold the shelf board at the desired height and use a level to ensure it’s perfectly horizontal. Mark the underside position lightly on the wall with pencil. Measure and mark where each bracket will sit, typically one bracket every 16 to 24 inches, aligned with studs.
Step 3: Attach the first bracket. Align the bracket’s mounting holes with the stud center at the marked height. Drill pilot holes using a bit slightly smaller than the screw diameter (a ⅛-inch bit works for most #10 or #12 screws). Drive 2½-inch wood screws through the bracket into the stud. Use at least two screws per bracket for stability.
Step 4: Level and attach remaining brackets. Place a level on top of the installed bracket and extend it to the next bracket location. Mark the height, ensuring it matches the first bracket. Repeat the pilot-drilling and screw-driving process. Double-check level between each bracket before proceeding.
Step 5: Secure the shelf. Rest the shelf board on the installed brackets. Confirm it sits flush and level. From underneath, drive 1¼-inch screws up through the bracket’s top holes into the shelf board. Two screws per bracket prevent the shelf from sliding or tipping.
Step 6: Load-test the shelf. Before loading it with supplies, apply firm downward pressure at the center and edges. The shelf shouldn’t flex more than ⅛ inch or creak. Any movement suggests missed studs or inadequate fasteners, address these before adding weight.
Safety note: Always wear safety glasses when drilling overhead. Drywall dust and wood particles fall directly toward the face during installation. If working alone, clamp the shelf board to the brackets temporarily while driving screws to prevent it from shifting.
Creative Ways to Organize Your Washer and Dryer Shelf
A well-installed laundry room shelf over washer and dryer handles the basics, detergent, softener, stain spray. But with a few organizing tricks, it becomes a command center for the entire laundry process.
Use clear bins or baskets to corral smaller items like clothespins, lint rollers, and stain sticks. Label the front of each bin with a label maker or chalkboard tag. This keeps the shelf tidy and makes it easy to spot when supplies run low. DIYers looking for more furniture building tutorials often adapt drawer divider techniques to shelf storage, using scrap wood to create custom compartments.
Install a second tier if ceiling height allows. A narrow upper shelf (6 to 8 inches deep) can hold seasonal items like wool dryer balls, mesh laundry bags, or backup light bulbs for the laundry room fixture. Mount it 12 to 18 inches above the main shelf using the same stud-finding and leveling process.
Add under-shelf hooks for hanging items like spray bottles, lint brushes, or a small dustpan. Adhesive hooks work on melamine and painted wood: screw-in hooks are more secure for heavier items. Many homeowners who enjoy creative hacks repurpose kitchen cabinet organizers, like door-mounted spice racks, as under-shelf storage for small bottles.
Incorporate a pull-down drying rack if the shelf is mounted high enough. Some brackets allow a fold-flat rack to attach to the underside of the shelf, providing air-drying space for delicates without taking up floor area. This setup works best when the shelf sits at least 68 inches above the floor.
Group items by workflow: Place pre-wash treatments (stain removers, color catchers) on the left side, detergents and softeners in the center, and post-wash supplies (dryer sheets, wrinkle spray) on the right. This left-to-right flow mirrors the laundry process and reduces hunting for the right product mid-cycle.
Common Mistakes to Avoid When Installing Laundry Room Shelves
Skipping the stud finder. Drywall anchors and toggle bolts aren’t adequate primary supports for shelves over washer and dryer units. A fully loaded shelf can weigh 40 to 60 pounds: toggle bolts in ½-inch drywall fail under sustained load. Always anchor brackets directly into studs using wood screws that penetrate at least 1½ inches into solid lumber.
Mounting the shelf too low. Homeowners often underestimate how much clearance they need for comfortable access. If the shelf sits within 2 inches of the appliances, reaching over the machines to grab items becomes awkward, especially for shorter users. The laundry room setup should leave at least 3 to 4 inches of clearance, more if the washer has a top-loading lid.
Using undersized brackets. Light-duty brackets rated for 20 or 30 pounds might seem adequate for laundry supplies, but they flex under load and create a bouncy, unstable shelf. Choose heavy-duty brackets rated for 50 pounds or more, even if the actual load will be lighter. The extra rigidity prevents sagging and extends the shelf’s lifespan.
Ignoring shelf depth. A 6-inch-deep shelf looks sleek but won’t hold standard detergent bottles (typically 4 to 5 inches deep). A 10- to 12-inch shelf accommodates most laundry products without items tipping forward. If space is tight, err on the side of a slightly deeper shelf, it’s easier to manage unused depth than to deal with items constantly falling off.
Forgetting to level between brackets. Installing the first bracket level doesn’t guarantee the others will align. Always re-check level when marking each subsequent bracket. A shelf that slopes even ½ inch over 5 feet will cause bottles to migrate to one end and create an uneven, sloppy appearance.
Overloading the shelf immediately. Even a properly installed shelf benefits from a 24-hour settling period, especially if using wood screws in softer stud material like SPF (spruce-pine-fir) lumber. Gradual loading also helps identify any weak points before a full collapse occurs.