Bathroom storage is a problem almost every homeowner faces. Toiletries pile up on counters, towels crowd vanity shelves, and cleaning supplies end up shoved under the sink behind a tangle of plumbing. A well-chosen floor storage cabinet solves these headaches without tearing into drywall or replumbing. Whether the homeowner is dealing with a cramped powder room or a sprawling master bath, the right cabinet keeps essentials organized, accessible, and out of sight, while filling that awkward gap between the toilet and shower or making use of a dead corner.
Table of Contents
ToggleKey Takeaways
- A bathroom floor storage cabinet eliminates clutter without requiring wall drilling or drywall damage, making it an ideal solution for organizing toiletries, towels, and cleaning supplies in any size bathroom.
- Moisture-resistant materials like MDF with PVC coating and solid wood with proper sealing are essential, and functioning exhaust fans (50 CFM minimum) expand the range of materials that safely work in high-humidity environments.
- Freestanding cabinets offer flexible storage with adjustable shelving and soft-close hinges, while corner floor cabinets maximize dead space but sacrifice interior volume compared to standard freestanding units.
- Proper installation requires careful leveling on sloped bathroom floors using plastic shims, securing tall cabinets to wall studs, and applying silicone caulk along edges to prevent water damage.
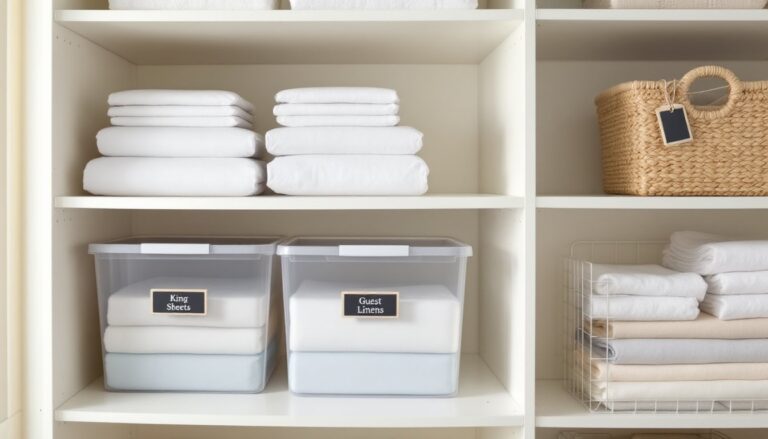
- Interior organization using shelf risers, lazy Susans, drawer organizers, and door-mounted racks significantly increases a cabinet’s functionality and prevents small items from getting lost or scattered.
- Prospective homeowners rank integrated storage solutions like floor storage cabinets among the top five bathroom features, making them a smart investment for both daily use and home resale value.
Why Every Bathroom Needs a Floor Storage Cabinet
Bathroom square footage rarely keeps pace with storage demands. Most builders allocate just enough room for a vanity and maybe a medicine cabinet, leaving homeowners scrambling for space to stash extra toilet paper, hair tools, and cleaning products.
A floor storage cabinet closes that gap. Unlike wall-mounted shelving, floor units don’t require stud-finding or drilling into tile, a common DIY pitfall that cracks grout or punctures waterproofing membranes. They sit directly on existing flooring, and most models weigh under 50 pounds when empty, so they won’t stress subfloors in older homes.
Floor cabinets also improve bathroom safety. Bottles and brushes stored on the floor become slip hazards when knocked over during a shower exit. Tucking them inside a cabinet with moisture-resistant MDF or solid wood construction keeps clutter off wet surfaces and reduces mold growth on organic materials.
From a resale perspective, organized storage scores high with buyers. According to recent bathroom design trends, integrated storage solutions rank among the top five features prospective homeowners seek. A thoughtfully placed floor cabinet signals that a home’s bathrooms are functional, not just decorative.
Types of Bathroom Floor Storage Cabinets
Not all floor cabinets suit every bathroom layout. Understanding the main types helps narrow choices before measuring begins.
Freestanding Cabinets
These are the workhorses of bathroom storage. Freestanding cabinets range from 12 to 24 inches wide, with depths between 10 and 16 inches. Most stand 30 to 36 inches tall, positioning the top surface at a convenient height for daily-use items like hand towels or a tissue box.
Materials vary widely. Solid wood cabinets, typically pine, oak, or bamboo, handle humidity better than particleboard but cost more and require periodic resealing with polyurethane or tung oil to prevent warping. Moisture-resistant MDF with melamine or PVC coating offers a budget-friendly middle ground, provided the finish remains intact at seams and edges where water can wick in.
Look for adjustable shelving inside. Fixed shelves lock users into one configuration, but adjustable pegs or tracks allow customization as storage needs shift. A cabinet with three adjustable shelves can accommodate tall bottles on one level and stacked washcloths on another.
Some freestanding units include soft-close hinges, a worthwhile upgrade in shared bathrooms. Standard hinges slam at 2 a.m., but soft-close dampers slow the door over the last inch of travel, reducing noise and wear on the cabinet frame.
Corner Floor Cabinets
Corners are dead zones in most bathrooms, too tight for furniture, too awkward for open shelving. Corner floor cabinets fit a 90-degree angle, typically measuring 12 to 18 inches per side of the triangle footprint. The angled front door or curved face minimizes the “stuck-out” look that makes small bathrooms feel cramped.
These units shine in bathrooms with pedestal sinks, which offer zero under-sink storage. Placing a corner cabinet adjacent to the sink keeps everyday items within arm’s reach without blocking the toilet or shower entry. Installation is straightforward: position the cabinet, check level with a 2-foot spirit level, and optionally secure the back to wall studs with L-brackets and 2-inch wood screws if the household includes kids who might climb.
One caveat: corner cabinets waste interior space due to their geometry. A 15-inch-per-side corner unit offers roughly 1.2 cubic feet of usable volume, while a 15-inch-wide freestanding cabinet of the same height delivers closer to 2 cubic feet. They’re a compromise, trading storage capacity for footprint efficiency.
How to Choose the Right Floor Cabinet for Your Bathroom
Matching a cabinet to a bathroom requires more than eyeballing dimensions. Start with these measurements:
• Available floor space: Measure width, depth, and any obstructions (baseboards, door swing, toilet flange). Remember that bathroom doors typically swing inward, so a cabinet placed directly opposite may block the door’s arc.
• Ceiling height and ventilation: Cabinets placed under wall-mounted exhaust fans need 3 to 4 inches of clearance to avoid blocking airflow, per IRC M1507 ventilation guidelines.
• Plumbing and electrical: Check for water supply lines, drain pipes, or outlets hidden behind baseboards. Use a stud finder with AC wire detection to avoid drilling into live circuits if wall-mounting brackets.
Material choice hinges on bathroom moisture levels. Bathrooms with functioning exhaust fans (50 CFM minimum for spaces under 100 square feet, per IRC) can tolerate a wider range of materials. Bathrooms without ventilation, common in older homes, need cabinets rated for high-humidity environments. Look for products with explicit “bathroom-safe” or “moisture-resistant” labeling, and avoid unfinished wood or raw MDF edges that will swell when exposed to steam.
Finish and color matter for both aesthetics and maintenance. Gloss or semi-gloss finishes resist water better than flat paint, and light colors show soap scum and mildew less than dark tones. White, light gray, and natural wood tones remain popular because they hide the inevitable splashes and drips that occur in bathrooms.
Door style impacts accessibility. Single-door cabinets work for narrow units (under 18 inches wide), but wider models benefit from double doors that expose the entire interior at once. Drawer-and-door combos, one or two shallow drawers up top, cabinet space below, keep small items like cotton swabs and razors from migrating to the back of a deep shelf.
For households managing accessibility needs, verify that cabinet doors open fully without hitting adjacent fixtures. A cabinet door that swings 170 degrees is easier to use from a seated position than one that stops at 90 degrees. Some modern designs feature sliding barn-style doors, though these require a few extra inches of wall clearance for the track hardware.
Installation Tips for DIY Bathroom Floor Cabinets
Most floor cabinets arrive flat-packed and require assembly before placement. Unbox everything in a dry room outside the bathroom, cardboard and packing materials shed debris that clogs drains.
Assembly steps:
- Lay out all hardware. Count screws, dowels, cam locks, and any L-brackets. Missing a single cam lock means the cabinet won’t hold square.
- Follow the manual’s panel orientation. Pre-drilled holes only align one way. Forcing a misaligned panel strips threads in MDF.
- Hand-tighten cam locks first, then snug with a screwdriver. Over-torquing cracks the surrounding material. If using a drill, set the clutch to 5 or 6.
- Check square before final tightening. Measure diagonals, they should match within 1/8 inch. If they don’t, loosen, rack the frame gently, and remeasure.
Placement and leveling:
Bathroom floors often slope toward the drain, especially in older homes with tile set in mortar beds. Set the cabinet in position and place a 4-foot level on top, checking both front-to-back and side-to-side.
If the floor slopes, use plastic or composite shims, never wood shims in a bathroom, as they’ll compress and rot. Slide shims under the low corners, recheck level, and trim excess shim material with a utility knife. For cabinets over 30 inches tall, securing the back to wall studs with 1.5-inch or 2-inch wood screws prevents tipping. This is especially important in households with children or pets.
Waterproofing the base:
Even moisture-resistant cabinets benefit from isolating the bottom from standing water. If the bathroom has a history of leaks or overflows, apply a bead of clear silicone caulk along the cabinet’s back and side edges where they meet the floor. This creates a dam that keeps spills from wicking under the cabinet. Don’t caulk the front edge, trapped moisture needs an escape route.
Safety note: Always wear safety glasses when drilling or cutting, and use a dust mask if sanding MDF edges, which release fine particulate matter.
For those who prefer visual guidance, platforms like Instructables host dozens of community-contributed assembly walkthroughs with photos and troubleshooting tips for common flat-pack issues.
Creative Ways to Organize Your Bathroom Floor Cabinet
A cabinet is only as useful as its internal organization. Without dividers or bins, small items avalanche every time the door opens.
Shelf risers double usable height inside cabinets with tall clearances. A simple wire or plastic riser (typically 6 to 10 inches tall) creates two storage tiers from one shelf, ideal for stacking folded towels below and toiletries above. Measure interior width before buying, most risers span 12 to 16 inches.
Lazy Susans make corner cabinets vastly more functional. A 10- or 12-inch turntable placed on a shelf brings back-of-cabinet items to the front with a spin. They work especially well for bottles and jars, which otherwise form an impenetrable wall.
Drawer organizers and bins corral loose items. Clear acrylic bins let users see contents without pulling everything out, while fabric bins soften the look of wooden storage cabinets with doors where a more casual aesthetic fits the space. Match bin dimensions to shelf depth, a 14-inch-deep shelf fits two 7-inch bins side-by-side with room to spare.
Door-mounted racks add storage to the inside of cabinet doors. Adhesive or screw-mount racks hold flat items like washcloths, extra sponges, or hair styling tools. Check door clearance first, racks can’t be so deep that they prevent the door from closing or interfere with shelves.
Vertical dividers keep sheet goods like cleaning cloths and hand towels upright instead of flopping over. Wire or acrylic dividers (similar to those used in kitchen cabinets for cutting boards) install on shelves in seconds.
For particularly narrow or awkward spaces, a skinny storage cabinet might be a better starting point, as these typically measure 6 to 10 inches wide and are designed with narrower shelves and pull-out drawers that prevent items from getting lost in deep recesses.
Labeling isn’t just for kitchens. A simple label maker or adhesive chalkboard labels keep everyone in the household on the same page about where items belong, especially useful in shared bathrooms where one person’s “organized” is another’s chaos.