That awkward space above the toilet might be the most underutilized real estate in your home. It’s vertical square footage begging for purpose, and Wayfair’s over-the-toilet storage options turn that wasted zone into functional, organized space without sacrificing floor area. Whether you’re dealing with a cramped powder room or a narrow full bath, the right shelving or cabinet unit can hold towels, toiletries, and cleaning supplies while keeping everything accessible. This guide walks through the best Wayfair styles, how to pick one that fits your bathroom’s layout and plumbing, and the installation steps to get it mounted securely.
Table of Contents
ToggleKey Takeaways
- Wayfair over the toilet storage transforms underutilized vertical space into 6–12 cubic feet of functional storage for towels, toiletries, and cleaning supplies without consuming floor area.
- Freestanding designs are renter-friendly and require no drilling, while wall-mounted cabinets offer enclosed storage for a streamlined look—choose based on your bathroom layout and rental restrictions.
- Proper measurements of toilet tank width, floor-to-ceiling height, and clearance from wall are essential; prioritize at least 3–6 inches of clearance above the tank lid for maintenance access.
- Moisture-resistant materials like powder-coated steel, sealed bamboo, and marine-grade plywood are critical in bathrooms with poor ventilation to prevent hardware corrosion and warping.
- Installation success depends on checking parts before assembly, using a stud finder for wall-mounted units, and always attaching the anti-tip strap to prevent tipping hazards.
- Style your Wayfair storage with uniform containers, rolled towels, and minimal decor on top shelves to create a spa-like, intentional look rather than a cluttered catchall.
Why Over the Toilet Storage Is a Bathroom Game-Changer
Small bathrooms rarely offer the luxury of a linen closet or extra cabinetry. Over-the-toilet storage solves that problem by capitalizing on vertical space that would otherwise sit empty. A well-chosen unit adds 6 to 12 cubic feet of storage, enough for rolled towels, backup toilet paper, spare soap, and cleaning bottles.
Unlike wall-mounted shelves that require drilling into tile or finding studs behind fiberglass surrounds, most over-the-toilet designs are freestanding. They straddle the toilet base or tank and rely on floor contact for stability, which means renters can install them without voiding a lease. This makes them one of the most accessible DIY storage upgrades for any skill level.
From a design standpoint, these units also define the toilet zone visually, especially in open-plan or combined bathrooms. Ladder shelves break up the wall expanse and give you a spot for decorative touches, small plants, candles, or a framed print. Cabinet-style units, on the other hand, conceal clutter entirely, which helps maintain a clean sightline in tight quarters.
Finally, the price-to-impact ratio is hard to beat. Wayfair’s catalog ranges from under $50 for basic metal frames to around $250 for solid-wood cabinet builds. Compare that to hiring a carpenter for custom shelving or tearing out drywall to add recessed niches, and the ROI becomes obvious.
Top Wayfair Over the Toilet Storage Styles to Consider
Wayfair stocks hundreds of over-the-toilet configurations, but they break down into two main camps: open ladder shelves and enclosed cabinets. Each suits different storage needs and aesthetic preferences.
Ladder Shelf Designs for Modern Bathrooms
Ladder shelves lean vertically against the wall and rest on the floor, with two or three tiers bridging the space above the tank. They’re typically made from bamboo, engineered wood, or powder-coated metal. The open design keeps sightlines clear, which visually expands tight bathrooms, a trick borrowed from professional staging techniques used to make small spaces feel larger.
Most ladder units measure 24 to 28 inches wide to clear a standard toilet tank, which is roughly 20 inches across. Depth runs 8 to 12 inches, shallow enough to avoid head clearance issues but deep enough for folded towels or wicker baskets. Look for models with an anti-tip strap included: these screw into drywall or a stud to prevent the unit from toppling forward when you load the top shelf.
Bamboo ladder shelves work well in coastal or organic-modern baths. They handle humidity better than MDF and resist water spotting if wiped down regularly. Metal ladder frames in matte black or brushed nickel fit industrial or transitional schemes and pair cleanly with chrome fixtures.
Cabinet Units for Hidden Storage
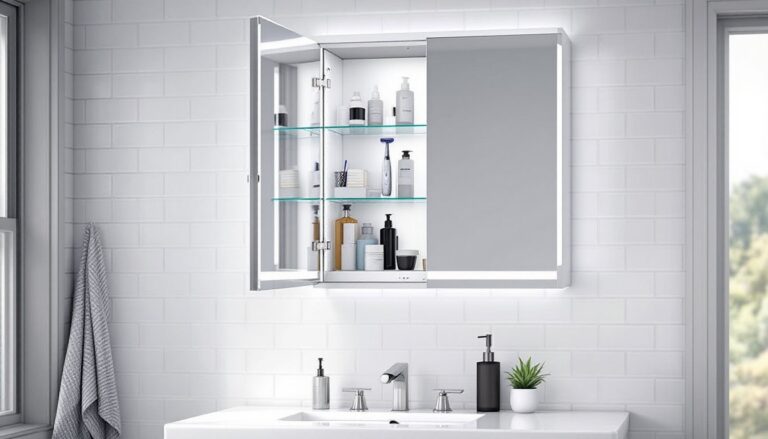
Cabinet-style over-the-toilet storage wraps around the toilet base with side panels and a top bridge, creating an enclosed alcove. Doors or drawers hide the contents, which keeps personal items, medications, extra razors, feminine hygiene products, out of sight. This style appeals to anyone who prefers a streamlined, clutter-free look.
Wayfair offers both freestanding and wall-mounted cabinet versions. Freestanding models rest on two side panels that flank the toilet: wall-mounted versions hang from the wall and hover above the tank, leaving the floor clear for easier mopping. The latter requires finding at least one wall stud or using heavy-duty drywall anchors rated for 50+ pounds, since the loaded weight of towels and bottles adds up fast.
Cabinet materials range from MDF with laminate finish (budget-friendly but sensitive to moisture) to solid pine or oak (more durable and moisture-resistant if sealed properly). Check the interior height clearance, some cabinets only leave 8 to 10 inches of space above the tank, which can interfere with tank lids that lift for flapper access. Measure your toilet’s total height, including the lid, before ordering.
Adjustable shelves inside the cabinet let you customize storage for tall bottles or stacks of washcloths. Soft-close hinges are a nice upgrade that prevents door slams and reduces wear on the hardware.
How to Choose the Right Over the Toilet Storage for Your Space
Measure first, shop second. Grab a tape measure and record three dimensions: the width of your toilet tank, the distance from the floor to the ceiling, and the clearance from the back wall to the front edge of the tank. Standard toilets are 27 to 30 inches deep from the wall to the bowl rim, but elongated bowls push closer to 32 inches. If your unit’s footprint extends past the bowl, you’ll be bumping into it every time you stand.
Next, think about what you’re storing. If you’re stashing bulky items like extra bath mats or a step stool, open ladder shelves with adjustable tier spacing give you flexibility. For smaller bottles and tubes, a cabinet with fixed shelves at 10- or 12-inch intervals works fine. Count the items you plan to store and sketch a quick layout to ensure the unit has enough tiers or compartments.
Humidity is a real factor. Bathrooms with poor ventilation, no exhaust fan or window, will corrode metal hardware and warp particle board over time. If your bathroom runs damp, prioritize moisture-resistant finishes: powder-coated steel, sealed bamboo, or marine-grade plywood. Avoid raw MDF or untreated pine unless you plan to seal it yourself with a water-based polyurethane.
Consider clearance for the toilet lid and tank access. Many toilets require lifting the lid to reach the fill valve, flapper, or flush handle linkage. If the bottom shelf or cabinet base sits too low, less than 3 to 4 inches above the tank lid, you’ll have to move the entire unit every time you troubleshoot a running toilet. Some home organization experts recommend leaving at least 6 inches of clearance to accommodate dual-flush mechanisms and taller tank assemblies.
Finally, match the finish to your existing hardware. If you have brushed nickel faucets and towel bars, a chrome ladder shelf will clash. Wayfair’s filters let you sort by finish, so you can coordinate metals or stick with wood tones that work with any palette.
Installation Tips and Tricks for DIY Success
Most over-the-toilet storage ships flat-packed and requires assembly. Clear a workspace larger than the unit’s footprint, living room floor or garage, and lay out all hardware before you start. Check the parts list against the instruction sheet: missing screws or cam locks are common, and it’s easier to contact Wayfair for replacements before you’re halfway through assembly.
Use a power drill with a Phillips bit to speed up assembly, but hand-tighten the final turn to avoid stripping particleboard threads. If the unit uses cam-lock fasteners (twist-lock connectors), a hex key or Allen wrench will be included. These work well for engineered wood but can loosen over time: add a dab of wood glue in the pilot hole for a more permanent bond if you don’t plan to disassemble later.
For freestanding units, level the floor first. Bathroom tile often has slight slopes for drainage, which can make the unit lean. Stick self-adhesive felt pads under the legs to shim and protect the floor finish. If the unit wobbles, trace the base onto cardboard, cut shims to size, and slip them under the low corners.
Wall-mounted cabinets demand more precision. Use a stud finder to locate framing behind drywall. Standard residential wall studs sit 16 inches on center, so you should hit at least one within the cabinet’s mounting bracket span. Mark the stud centerline with a pencil, then hold the cabinet in place and mark the screw holes. Drill pilot holes with a 1/8-inch bit to prevent the wood from splitting, then drive 3-inch wood screws through the cabinet’s hanging rail into the stud.
If no stud aligns with your bracket, use toggle bolts or molly anchors rated for at least 50 pounds each. Drywall alone won’t hold the weight of a loaded cabinet. Drill the anchor hole, insert the toggle, and tighten until it seats firmly against the back of the drywall. Double-check level before you fully tighten: once the anchors are set, repositioning means patching and redrilling.
Always wear safety glasses when drilling overhead, especially in older homes where tile dust or plaster chips can fall. If you’re drilling into tile, switch to a carbide-tipped masonry bit and use low speed with steady pressure to avoid cracking the glaze.
Finally, attach any included anti-tip strap. This is a small L-bracket or cable that anchors the top of the unit to the wall. It’s not optional if you have kids or pets: a curious toddler pulling on a shelf can tip a freestanding unit forward. Screw the strap into a stud or use a drywall anchor rated for the shear load.
Styling Your Over the Toilet Storage Like a Pro
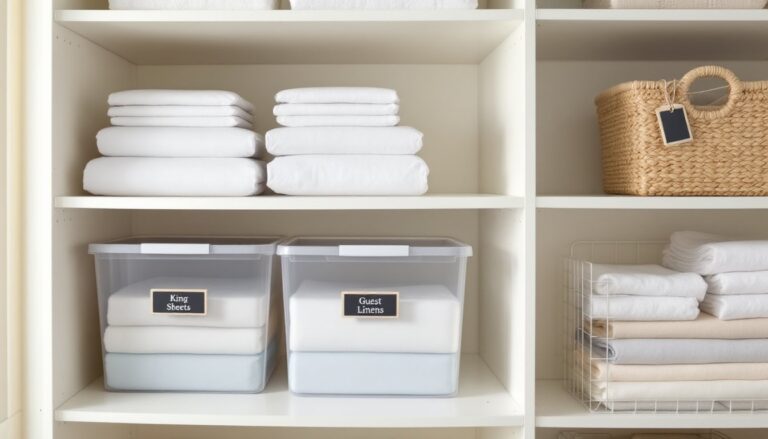
Function comes first, but a little styling makes the unit feel intentional instead of utilitarian. Start with uniform containers. Wicker baskets, fabric bins, or clear acrylic boxes corral small items and create visual rhythm across open shelves. Stick to two or three colors max, white bins with natural wicker, or all matte black for a modern edge.
Roll towels instead of folding them flat. Rolled towels take up less vertical space, show off color or pattern along the edge, and make it easier to grab one without disturbing the stack. Stack them horizontally on their side, like wine bottles, for a spa-inspired look borrowed from boutique hotel bathrooms.
Leave the top shelf for decor, not daily-use items. A small potted pothos or snake plant thrives in bathroom humidity and softens hard edges. Avoid real flowers unless you change the water every other day: stagnant water breeds mold in damp environments. A scented candle or reed diffuser adds fragrance, but keep wicks and reeds away from the toilet’s splash zone.
If you went with a cabinet, use the top surface as a vignette zone: a tray with a folded hand towel, a small clock, or a framed print. Keep items low-profile to avoid blocking the mirror if your cabinet sits tall.
For ladder shelves, stagger heights with stacked items on one shelf and a single tall bottle or plant on the next. This creates visual interest and prevents the “stacked box” effect that makes shelves look cluttered. Use the rule of thirds: place objects off-center, not smack in the middle of each shelf.
Finally, keep it edited. The moment you start stuffing expired sunscreen and hotel shampoo bottles on display, the unit becomes an eyesore. Rotate stock every few months, toss empties, and resist the urge to fill every inch. Negative space is part of good design, it gives the eye a place to rest and signals that the area is under control.