Shoes piled by the front door aren’t just an eyesore, they’re a tripping hazard and a magnet for tracked-in dirt. A functional shoe storage entryway system keeps footwear organized, protects flooring, and sets the tone for the rest of your home. Whether you’re working with a spacious mudroom or a narrow hallway, the right entryway shoe storage ideas can reclaim floor space and cut down on daily clutter. This guide walks through proven solutions, DIY builds, and space-saving tactics tailored to real-world entryways.
Table of Contents
ToggleKey Takeaways
- Entryway shoe storage prevents tracked-in dirt, protects flooring, and speeds up morning routines while improving home resale appeal.
- Shoe benches, cubbies, and enclosed cabinets are the main storage solutions—choose based on your space size, household shoe volume, and moisture exposure.
- Wall-mounted racks, over-the-door organizers, and corner units maximize small entryway spaces by utilizing vertical area instead of floor footprint.
- Material selection matters: use sealed wood, powder-coated metal, or high-density polyethylene in wet climates, and avoid unsealed MDF that deteriorates near exterior doors.
- DIY projects like wall-mounted cubbies and lift-top benches can be built in a weekend using basic tools and offer customization for awkward entryway layouts.
- Proper ventilation in enclosed shoe storage prevents moisture buildup and odor—drill 1-inch holes every 6 inches or use louvered doors with vents at top and bottom.
Why Proper Entryway Shoe Storage Matters
Entryway shoe storage does more than hide sneakers. It protects hardwood and tile from scuffs, traps dirt before it spreads, and speeds up morning routines when everyone knows where their shoes are.
Homes with dedicated shoe entryway storage see less tracked-in grime on carpets and fewer arguments over missing footwear. A well-designed setup also improves ventilation, wet boots and running shoes dry faster on slatted shelves or ventilated racks than crammed in a pile.
From a resale perspective, buyers notice entryway organization. A tidy, purpose-built storage area signals that the home has been maintained with attention to detail. If you’re planning to sell within a few years, a clean entryway with built-in or cohesive storage adds curb appeal the moment someone steps inside.
Types of Entryway Shoe Storage Solutions
Shoe Benches and Cubbies
Shoe benches combine seating with open or semi-open storage below. Most measure 16–20 inches deep and 18 inches high for comfortable sitting while lacing boots. Look for benches with slatted shelves or lift-top compartments to keep muddy soles off the floor.
Cubbies work well for families. Each person gets a designated slot, reducing morning chaos. Standard cubbies are sized around 12 inches wide by 14 inches high, fitting adult shoes up to men’s size 13. Pair cubbies with removable plastic or metal trays underneath to catch dirt and simplify cleaning.
For high-traffic homes, choose benches with a solid hardwood or plywood frame and a finish rated for moisture resistance. Avoid particleboard in mudrooms, it swells and delaminates when exposed to wet footwear. If you’re buying ready-made, check that the seat supports at least 250 pounds if adults will be sitting to tie shoes.
Shoe Cabinets and Enclosed Storage
Enclosed cabinets hide clutter and work in formal entryways where open shelving looks too casual. Shallow cabinets (10–12 inches deep) fit snugly against walls without blocking pathways. Many modern designs use tip-out drawers or drop-front doors that angle shoes for easy access while keeping them out of sight.
Ventilation is critical. Cabinets without airflow trap moisture and breed odor. Look for louvered doors, perforated back panels, or built-in vents near the top and bottom. If you’re building your own, drill 1-inch holes along the top rail and toe kick, spaced every 6 inches, or use metal vent grilles.
Tilt-out shoe cabinets are popular in narrow hallways. They project only 8–10 inches from the wall and hold 12–18 pairs depending on model. Installation requires locating wall studs and using 3-inch wood screws into at least two studs, since the loaded weight can exceed 50 pounds. Use a level during install, tilt-out doors bind if the cabinet is racked even slightly.
Choosing the Right Shoe Storage for Your Space
Measure your entryway’s width, depth, and ceiling height before shopping. Entryways narrower than 48 inches benefit from wall-mounted or shallow cabinets that don’t obstruct traffic flow. Wider spaces (60+ inches) can accommodate benches or freestanding towers.
Consider household size and shoe volume. A two-person household might need storage for 8–12 pairs up front, while families with kids require 20+ pairs plus seasonal rotation. Budget 6–8 inches of linear space per pair on open shelves, or 4–5 inches per pair in stacked cabinets.
Match material to your entryway’s exposure. Homes in wet or snowy climates need storage that handles moisture, sealed wood, powder-coated metal, or high-density polyethylene. Avoid unsealed MDF or fabric bins near exterior doors: they’ll wick water and deteriorate within a season.
For modern entryway shoe storage ideas, look at modular systems that mount to wall tracks. These let you reconfigure shelves, hooks, and baskets as needs change. Brands using aluminum tracks and steel brackets offer the best longevity, and many creative shoe storage solutions incorporate adjustable components for flexibility.
DIY Entryway Shoe Storage Ideas
Building custom shoe storage for entryway spaces lets you tailor dimensions to awkward alcoves and underutilized corners. Here are two proven projects.
Project 1: Wall-Mounted Cubby Rack
Materials:
- (2) sheets 3/4-inch plywood, 4×8 feet
- Wood glue and 1-1/4-inch brad nails
- Pocket-hole jig (optional but recommended)
- 2-1/2-inch wood screws for wall mounting
- Sandpaper (120- and 220-grit)
- Primer and semi-gloss paint or polyurethane
Tools:
- Circular saw or table saw
- Drill/driver
- Stud finder
- Level
- Safety glasses and hearing protection
Steps:
- Cut plywood: Rip vertical dividers to 12 inches wide by 48 inches tall. Cut horizontal shelves to 12 inches deep by the total width you need (e.g., four cubbies = 48 inches plus divider thickness).
- Assemble: Use a pocket-hole jig to join shelves and dividers, or apply wood glue and clamp overnight, then reinforce with brad nails. Space shelves 14 inches apart vertically.
- Sand and finish: Sand all edges with 120-grit, then 220-grit. Prime and paint with two coats of semi-gloss for easy cleaning.
- Mount: Locate studs with a stud finder. Drill pilot holes through the back rail into at least two studs, then drive 2-1/2-inch screws. Check level before final tightening.
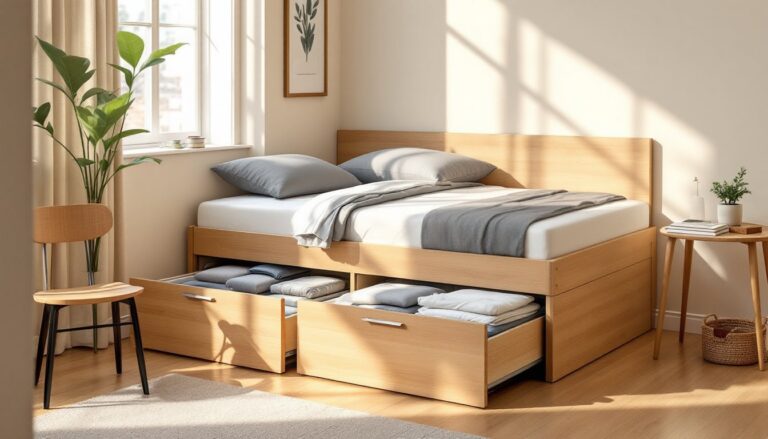
Project 2: Shoe Bench with Lift-Top Storage
This build mimics popular IKEA hacks for entryway benches using basic framing and a hinged lid.
Materials:
- (4) 2×4 studs, 8 feet (frame)
- (1) sheet 3/4-inch plywood (seat and sides)
- Piano hinge, 36 inches
- 1/4-inch plywood or hardboard (back panel)
- Construction adhesive and 2-1/2-inch deck screws
- Foam cushion and fabric (optional)
Steps:
- Build frame: Cut 2×4s to form a rectangle 42 inches long by 16 inches deep by 18 inches tall. Use pocket screws or metal corner brackets at joints.
- Add sides and base: Cut plywood panels for left, right, and base. Attach with construction adhesive and 1-1/4-inch screws.
- Install lid: Cut a 42×16-inch plywood lid. Attach a piano hinge along the back edge. Test the swing, clearance should be at least 1/4 inch at front to prevent binding.
- Ventilate: Drill 1-inch vent holes along the back panel or use a router to cut decorative slots.
- Finish: Sand, prime, and paint. Add a foam cushion wrapped in vinyl or outdoor fabric, stapled underneath the lid.
Safety notes: Wear safety glasses when cutting and a dust mask when sanding. If using a table saw, keep push sticks handy and never reach over a spinning blade.
Maximizing Small Entryway Spaces
Small entryway shoe storage ideas focus on vertical space and multi-function pieces. When floor area is tight, go up.
Wall-mounted racks with angled shelves or pegs keep shoes off the floor without deep cabinetry. Mount these 12–18 inches above the baseboard to leave room for boots. Use toggle bolts or screw-in drywall anchors rated for 50 pounds if studs aren’t available where you need them.
Over-the-door organizers with clear pockets work in closets adjacent to entryways. Choose ones with reinforced metal hooks that grip the door top, plastic hooks crack under repeated use. Each pocket typically holds one pair of flats or kids’ shoes.
Slim console tables with lower shelves provide a surface for keys and mail while storing 4–6 pairs of shoes below. Look for consoles 10–12 inches deep, anything deeper intrudes into walkways. Some compact shoe storage products combine open lower shelves with small drawers above for accessories.
Corner units exploit dead space. Triangular or wedge-shaped shoe racks fit into 90-degree corners and hold 8–12 pairs. Anchor these to at least one wall stud to prevent tipping.
Hooks and pegboards above the shoe storage area handle bags, hats, and dog leashes, keeping the floor clear. Space hooks 6 inches apart horizontally and mount pegboard with 1-inch standoffs behind it so hooks can insert fully.
For ultra-tight spaces (less than 36 inches wide), consider a fold-down wall shelf. These hinge up when not in use and drop down to hold 2–3 pairs temporarily while you’re coming or going. Install these with heavy-duty strap hinges and a simple barrel bolt latch to lock them upright.