Glass kitchen storage containers have moved from nice-to-have to must-have for serious home cooks and organizers. They’re durable, safe, and make pantry shelves look like something out of a design magazine. More importantly, they solve real problems: no more stale cereal, mystery leftovers, or plastic containers that warp in the dishwasher. Whether someone’s meal-prepping for the week or corralling a chaotic spice collection, the right glass containers make kitchen storage cleaner, safer, and a whole lot more functional.
Table of Contents
ToggleKey Takeaways
- Glass kitchen storage containers are durable, non-toxic, and preserve food longer by preventing odor absorption and chemical leaching unlike plastic alternatives.
- Borosilicate glass withstands thermal shock and resists staining, making glass storage containers ideal for meal prep and pantry organization when handled correctly.
- Proper container selection depends on assessing your specific needs—measure available space, prioritize lid quality with four-point locking mechanisms, and choose rectangular shapes for optimal storage efficiency.
- Organize glass containers by category with clear labels, use vertical stacking to maximize space, and keep refrigerator zones separate to prevent cross-contamination and foodborne hazards.
- Regular maintenance extends container lifespan significantly: use vinegar solutions for hard water spots, replace damaged lids promptly, and avoid temperature shock by letting glass containers cool gradually between hot and cold environments.
- Common mistakes like overfilling, using damaged containers, and mismatching lids compromise food safety and seal effectiveness, so always follow manufacturer guidelines and inspect containers before each use.
Why Glass Storage Containers Are a Kitchen Game-Changer
Glass containers offer advantages that plastic and metal can’t match. Borosilicate glass, the type used in most quality storage containers, resists thermal shock, meaning it won’t crack when going from freezer to oven (always check manufacturer specs first). Unlike plastic, glass doesn’t absorb odors, stains, or chemicals. That marinara sauce that permanently tinted every plastic container? Not a problem with glass.
Glass is also inert. It won’t leach BPA, phthalates, or other compounds into food, even when heated. For families concerned about food safety, this is a major selling point. The see-through design isn’t just aesthetic, it eliminates guesswork. No more opening five containers to find the brown sugar.
Durability matters too. Quality glass containers last decades if handled properly. They’re dishwasher-safe, microwave-safe (lids off), and oven-safe up to temperatures specified by the manufacturer, typically 400-500°F for borosilicate glass. The upfront cost is higher than plastic, but the lifespan makes them a better long-term investment.
One caveat: glass is heavier and breakable. Drop one on tile, and it’s done. For households with young kids or anyone with grip strength issues, this is worth considering. But for most kitchens, the benefits far outweigh the fragility.
Types of Glass Kitchen Storage Containers
Not all glass containers serve the same purpose. Knowing the main types helps match the container to the task.
Food storage containers with airtight lids are the workhorses. These come in various sizes, typically 1-cup to 8-cup capacities, with snap-lock or silicone-sealed lids. Experts who tested leading models for stain resistance and sealing performance found that tight seals prevent leaks and keep food fresh longer. Look for BPA-free plastic or silicone lids with four-point locking mechanisms for the best seal.
Meal prep containers are shallower and often sold in sets of identical sizes. They’re designed for portioning out lunches or dinners for the week. Most hold 2-4 cups and have single-compartment or divided designs. If someone’s serious about meal prep, uniform sizing makes stacking in the fridge much easier.
Canisters and jars are for dry goods: flour, sugar, pasta, rice, coffee. These feature wide mouths for scooping and airtight lids (usually bamboo, metal, or glass with silicone gaskets). Sizes range from 16 oz to 102 oz. Square or rectangular canisters use shelf space more efficiently than round ones.
Specialty containers include butter dishes, oil dispensers, and stackable modular systems. Modular systems, containers designed to nest and stack, maximize vertical space in cabinets and pantries, a smart move for small kitchens.
For those who also organize craft supplies or other household items, glass jars and canisters can pull double duty in workshops or utility rooms.
Choosing the Right Glass Containers for Your Needs
Matching containers to actual use prevents buyer’s remorse and wasted cabinet space.
Assess storage needs first. Walk through the kitchen and note what’s currently in disarray: bulk pantry staples, leftovers, baking supplies, snacks. Measure available shelf and fridge space, height, width, and depth. A beautiful 10-inch-tall canister won’t fit on a shelf with 9 inches of clearance.
Lid quality matters as much as the glass. Cheap lids warp, crack, or lose their seal within months. Look for lids made from silicone or high-grade polypropylene (PP #5). Four-sided snap locks provide better seals than two-sided. Some lids have built-in vents for microwave reheating: others are fully sealed for liquids. Match lid style to the intended use.
Shape affects storage efficiency. Rectangular and square containers use space better than round ones, simple geometry. But round containers are easier to clean (no corners for gunk to hide). For pantry storage, go square. For leftovers and meal prep, either works.
Size variety is key. A set with only large containers is useless for small portions. Look for sets that include a range: 1-cup, 2-cup, 4-cup, and 6-8 cup sizes cover most needs. Buying a few extra of the most-used size is smarter than a giant set with sizes that never get used.
Check oven and microwave ratings. Not all glass containers are oven-safe. If someone plans to bake or reheat in the container, verify the maximum safe temperature. Borosilicate glass handles thermal stress better than standard soda-lime glass.
Budget will vary, but expect to pay $3-8 per container for quality options. Sets offer better value than buying individual pieces. Spending a bit more upfront on durable lids and thick glass saves money over time.
How to Organize Your Kitchen with Glass Storage Containers
Switching to glass containers is only half the job, organization makes them actually useful.
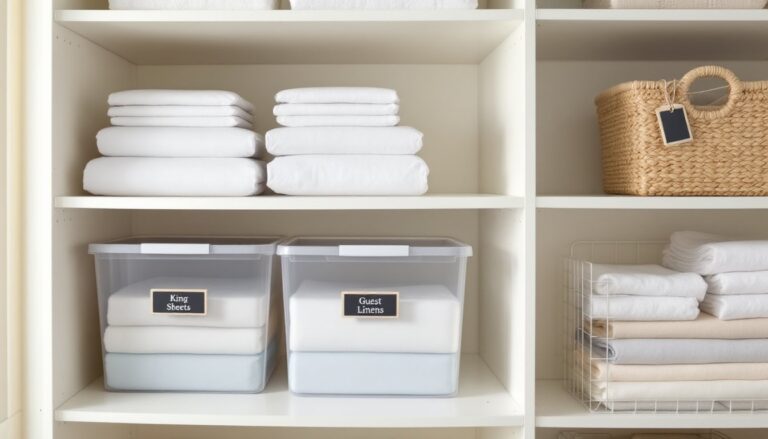
Decant dry goods into uniform containers. Transfer flour, sugar, rice, oats, and pasta from their original packaging into airtight canisters. This keeps pests out, preserves freshness, and creates a cohesive look. Label each container with a label maker or chalkboard labels. Include the purchase or expiration date if relevant.
Group by category. Store baking supplies together (flour, sugar, baking powder, chocolate chips). Keep breakfast items (oats, granola, cereal) in one zone. This reduces time spent hunting for ingredients. Use shelf risers or tiered organizers to make back-row containers visible and accessible.
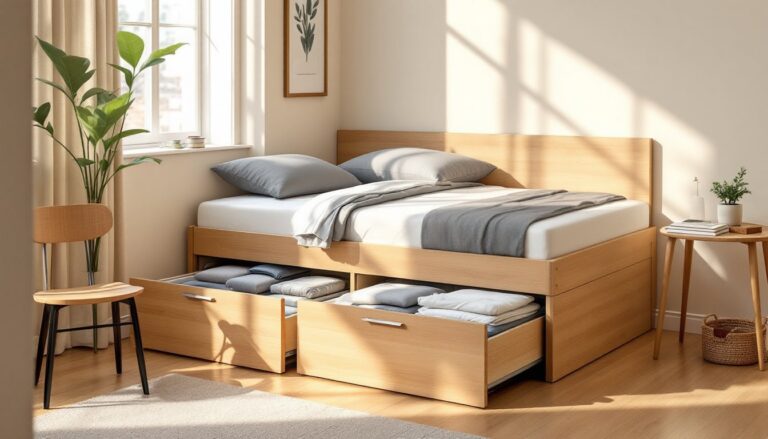
Use vertical space. Stackable containers maximize cabinet and pantry height. Make sure lids are designed for stacking, some interlock, others just sit on top. For deep shelves, place taller containers in back and shorter ones in front.
Refrigerator strategy matters. Designate zones: leftovers on one shelf, meal-prep containers on another, prepped ingredients (chopped veggies, cooked grains) in a third area. Glass containers’ transparency makes inventory checks quick, no more science experiments growing mold in the back. Testing by independent reviewers confirmed that quality seals prevent leaks, so stacking in the fridge is safe.
Drawer organization. Small glass jars work great for spices, tea bags, or snack portions. Arrange them in shallow drawers with dividers to prevent sliding.
Keep lids accessible. Lid chaos is real. Store lids in a separate drawer organizer or use a file organizer to stack them vertically. Some people prefer to store containers with lids on, but this uses more space. Match storage method to available space and personal preference.
For kitchens with limited cabinet space, consider the strategies used by kitchen organization experts who prioritize accessibility and visual clarity.
Caring for and Maintaining Your Glass Containers
Proper care extends the life of glass containers and keeps them looking new.
Daily cleaning: Most glass containers are dishwasher-safe (top rack is safest). For hand washing, use warm soapy water and a non-abrasive sponge. Avoid steel wool or harsh scrubbers that can scratch glass. Lids may need hand washing, check manufacturer guidelines. Silicone and some plastics degrade faster in the dishwasher.
Removing odors and stains: Glass itself won’t stain, but lids can. For stubborn smells in lids, soak them in a solution of 1 tablespoon baking soda per cup of warm water for 30 minutes. For tomato stains on lids, make a paste of baking soda and water, scrub gently, then rinse.
Dealing with hard water spots: White film on glass is mineral buildup. Soak containers in a solution of equal parts white vinegar and water for 15-20 minutes, then wash normally. For persistent spots, use a paste of vinegar and baking soda.
Preventing breakage: Never place a hot glass container directly on a cold surface or vice versa, thermal shock can cause cracking, even with borosilicate glass. Let containers cool before refrigerating. When moving from freezer to oven, allow the container to come to room temperature first, or follow manufacturer instructions for safe temperature transitions.
Inspect regularly: Check lids for cracks, warping, or damaged seals. A compromised lid won’t keep food fresh. Replace lids as needed, many manufacturers sell replacement lids separately.
Storage when not in use: Stack containers carefully. Place a paper towel or cloth between stacked pieces to prevent scratching or chipping. Store lids separately if space allows, or nest containers with lids on if cabinet space is tight.
Common Mistakes to Avoid When Using Glass Storage
Even quality containers fail when used incorrectly.
Overfilling containers. Leave at least 1/2 inch of headspace when storing liquids or foods that expand (soups, stews, grains). Liquids expand when frozen, overfilling can crack glass or pop lids off.
Using damaged containers. Chipped or cracked glass is a safety hazard. A tiny chip can propagate into a full break under stress. Inspect containers before each use. If damaged, recycle the glass and replace the container.
Ignoring temperature limits. Not all glass containers are created equal. Standard soda-lime glass may shatter in the oven. Always verify the manufacturer’s maximum oven temperature, usually printed on the container or packaging. When in doubt, don’t risk it.
Skipping the pre-wash. New containers should be washed before first use to remove manufacturing residues and dust. This is especially important for containers that will store food long-term.
Mixing and mismatching lids. Lids from different brands rarely fit properly, even if they look close. A poor seal defeats the purpose of airtight storage. Stick with lids designed for the specific container brand and model.
Neglecting gaskets and seals. Silicone gaskets in lids can collect food particles and develop mold if not cleaned thoroughly. Remove gaskets periodically (if removable) and wash separately. Replace worn gaskets, some manufacturers sell these as spare parts.
Using metal utensils on glass. While glass is scratch-resistant, it’s not scratch-proof. Metal spoons or scoops can create micro-scratches over time. Use silicone, wood, or plastic utensils when scooping directly from containers.
Conclusion
Glass kitchen storage containers are an investment in both function and longevity. They keep food fresher, eliminate chemical concerns, and, when organized properly, transform chaotic cabinets into efficient workspaces. Choose containers based on actual storage needs, maintain them properly, and avoid common misuse mistakes. Done right, a good set of glass containers will outlast trends, kitchen remodels, and probably the next refrigerator. The upfront effort pays off every time someone opens a pantry and actually finds what they need.